This guide will cover the creation of a Simple Product within Bob2.
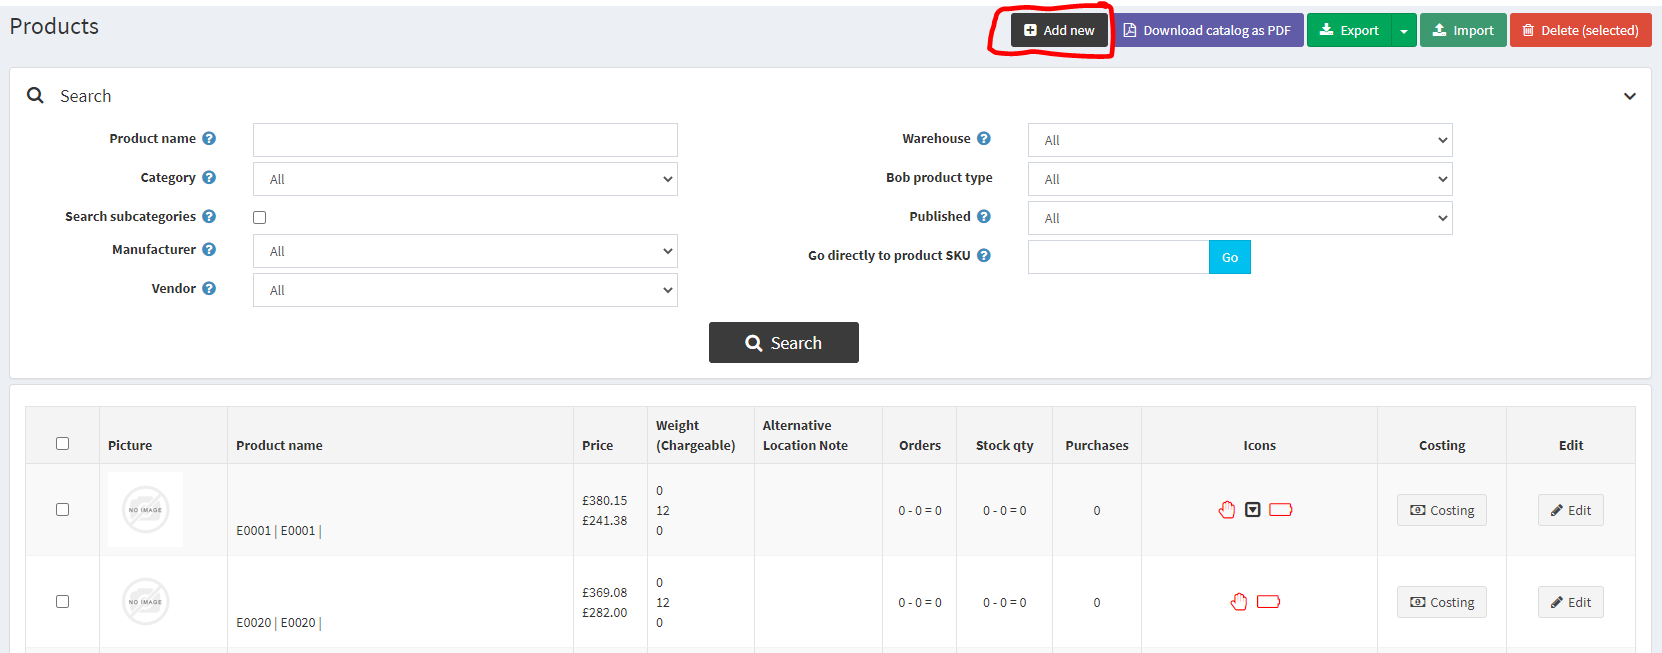
Navigate to BoB2 → Products → Product List and press the “Add New” button in the top-right corner.
Required Data Entry
When pressing “Add New” you will be displayed with the Product create screen, and you will notice data related to “Product Info”, please fill out the fields below…
- Product Info tab…
Select Bob Product type ‘Simple’ from the dropdown, Enter Product Name, Stock Name, SKU, add a Vendor and Manufacturer. Enter a Net Price and a Cost and define weights.
Once entered, please press “Save and Continue Edit” and you will be presented with a full list of tabs and data to input for the Product. Please ensure you enter at least the following below…
- Product Info tab…
Select Visible Individually (unless you do not want the product to be visible on its own on any stores, for example, if this product is for an attribute and you don’t want to sell it on its own page then you would uncheck this. Such as a Product like “Blue Paint” – alternatively, check this field and define a store (Limited to Store) so that you are able to restrict its visibility), Short Description, Full Description, select Published (if you want the Product to be live, uncheck if not. Note: Remember to switch it on when ready for sale), select a Category, define a Store (Limited to stores – Bob2 + your store), Mark as new checked, mark as new start date entered (this is your first stocked date so if you know it exactly then enter it, if you only know an estimate then enter that and update when Receipted, leave Mark as new end date blank or give a date if you know when you wont be stocking it e.g. limited time)
-
Price tab…
Select Tax Category (usually Standard, this should have already defaulted the stores default tax category) -
Shipping Tab…
Enter weights, dimensions, select Shipping Enabled -
Inventory Tab…
select Inventory Method (Track Inventory), check Display Availability, Back Orders (Allow Qty below 0 and Notify Customer), define the products Availability Range (set to something other than none), Minimum Cart Qty (1), Maximum Cart Qty (more than 1 or more than Minimum Cart Qty) - SEO Tab…
Search engine friendly page name (This is the required URL)
PLEASE NOTE!
To further amend a Cost Price, please see the “Product Costing” guide here (https://ibridge.co.uk/help/adjusting-cost/)
Assigning a Location and Updating Stock
-
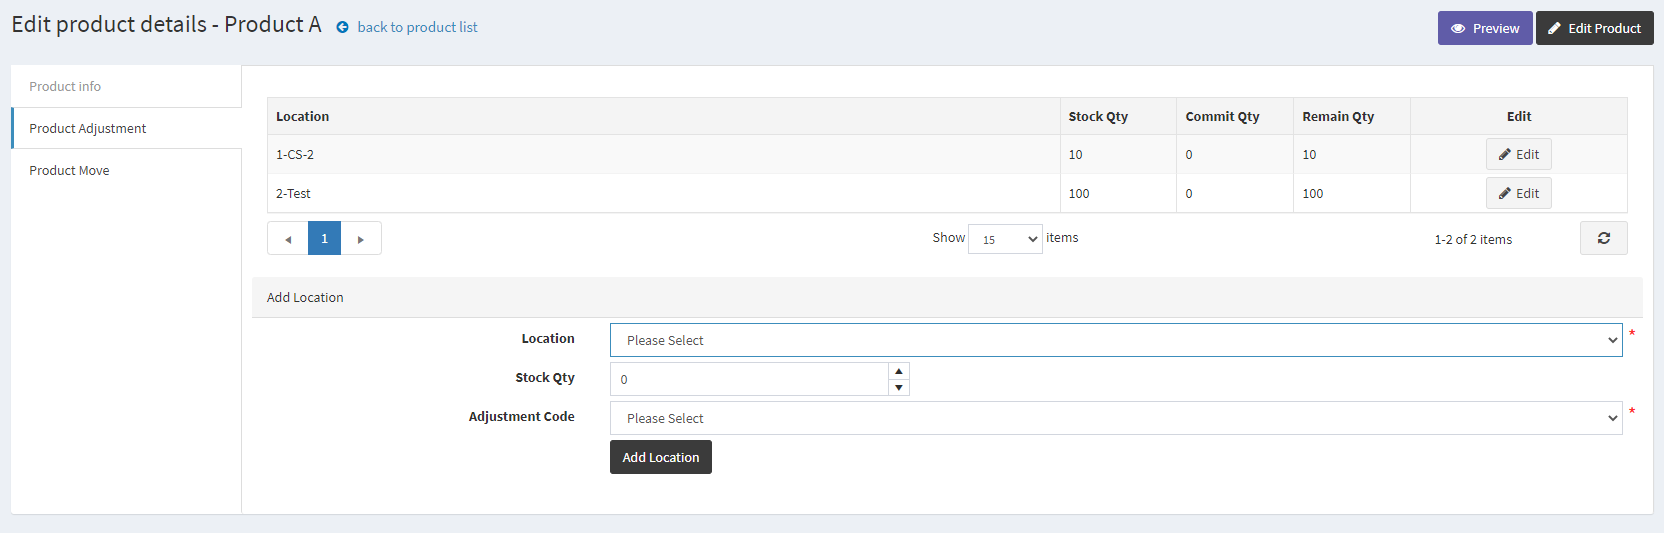
Assigning a Product Location and adjusting the Stock Quantity. Pressing “Add a new Attribute” will allow the user to make Product Adjustments by taking them to a different screen and menu.
-
Within the Product Adjustment tab, please enter a Location, Stock Qty value and Adjustment code before pressing “Add Location”. This will add stock for that Product in the specified location…
Adding Product Images
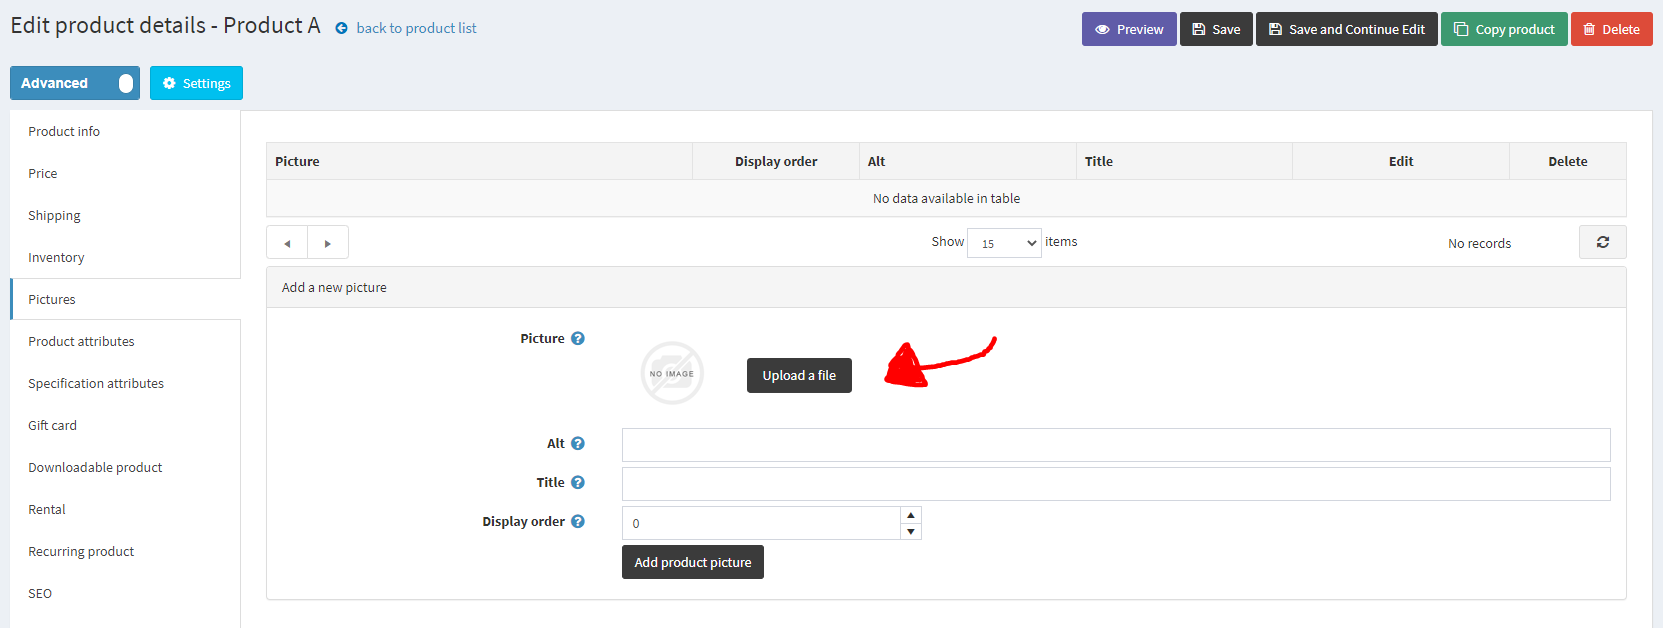
Within the “Pictures” tab, for each image you want to add for the Product…
-
upload a file (.png, .jpg)
-
enter a title
-
press “Add Product Picture”
After adding the images you desire, press “Edit” next to each and you can define the “Display Order”, which dictates the position that the image will be ordered in on the website. E.g. 0 will be the first image the Customer will see when viewing the Product, 1 = the second image they see.
Saving Changes
-
Click “Save” or “Save and Continue Edit” at the top of the Product screen.
Product Preview
-
Preview product to ensure it is laid out as desired by pressing the “Preview” button.