
Navigate to BoB2 → Purchasing→ Purchase Orders
You will be displayed with the Purchase Order search grid where you can search for PO’s, view the status’, search for PO’s containing specific products etc.

Adding/Editing a Purchase Order
Press “Add New” to create a new Purchase Order or “Edit” to continue processing a Purchase Order already started or view and clone one that has already been completed. See cloning guide…
Create New Purchase Order Screen
After pressing “Add New” you will be displayed with the Purchase Order create screen. From here we need to enter…

- Vendor name
- Vender reference (optional)
- Expected date
Save and continue edit. Which will display the Purchase Order Maintenance screen.
Purchase Order Maintenance Screen
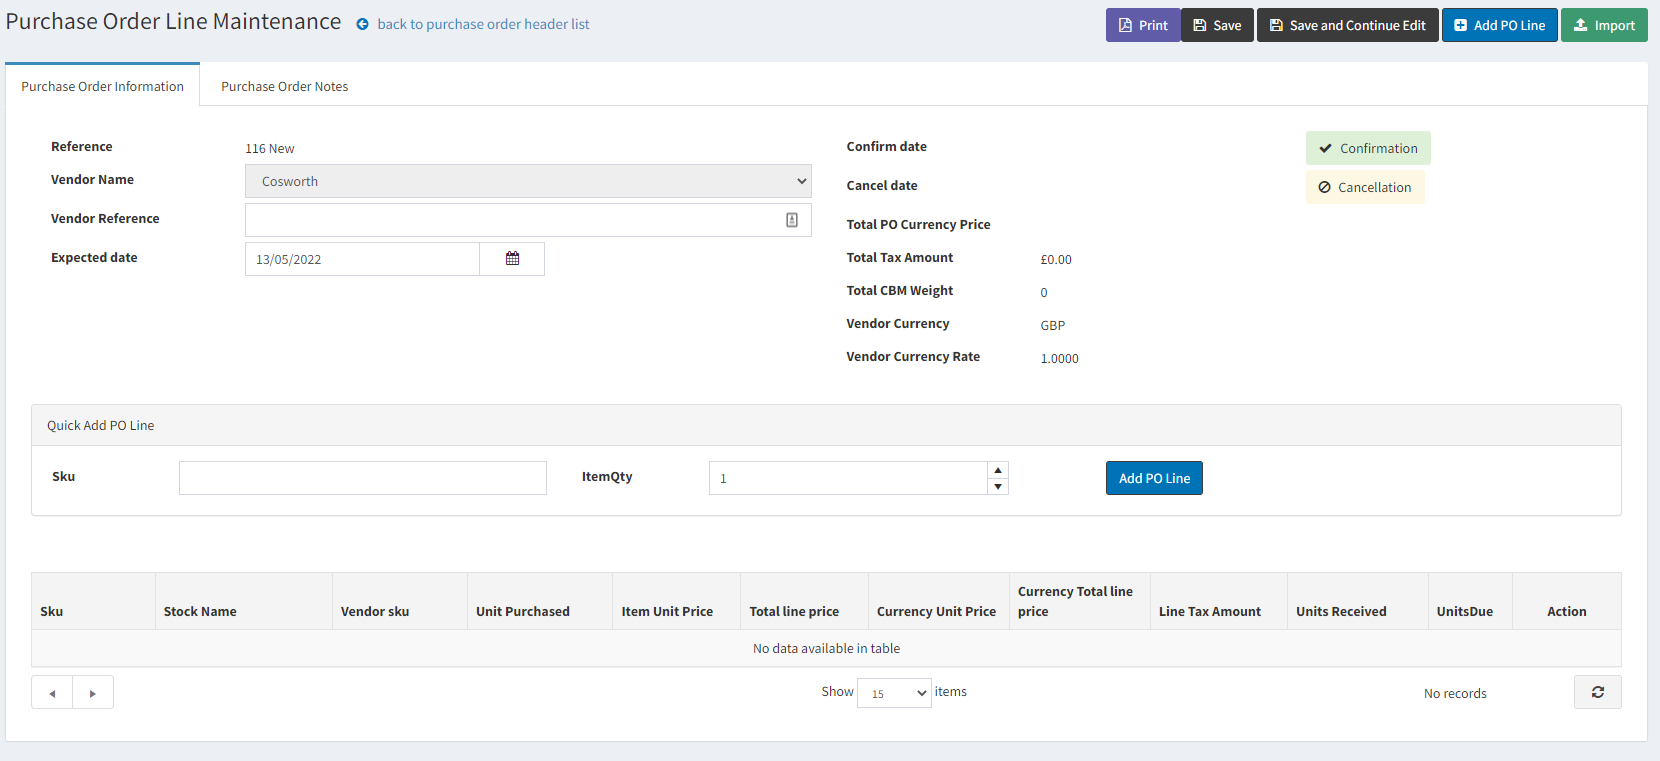
Adding Purchase Order Lines
There are several different ways we can add PO Lines.
- Import XLS – In the top-right corner you will notice “Import”. This allows you to import an XLS file. See more information at the guide below…
- Quick Add – In the centre of the screen you will see a box labelled “Quick Add PO Line”. All that is required for this is to enter the Product SKU and Item Quantity for the Product you wish to add for that PO (Should be a Product already set up and assigned to the correct Vendor for which the PO is also set to). When you have entered these details you can simply press “Add PO Line” and it should be added to the grid below. NOTE: Only use Import via XLS if it is the first time Purchasing this Product in Bob2 where the currency is NOT GBP.

- Product Search – In the top-right corner you will notice a button labelled “Add PO Line”. This displays the product search screen, where you can manually add products to the PO. After pressing “Add PO Line”, you will be displayed the Search Products screen, where you can find the Products you want to add to the Purchase Order. NOTE: Only use Import via XLS if it is the first time Purchasing this Product in Bob2 where the currency is NOT GBP.
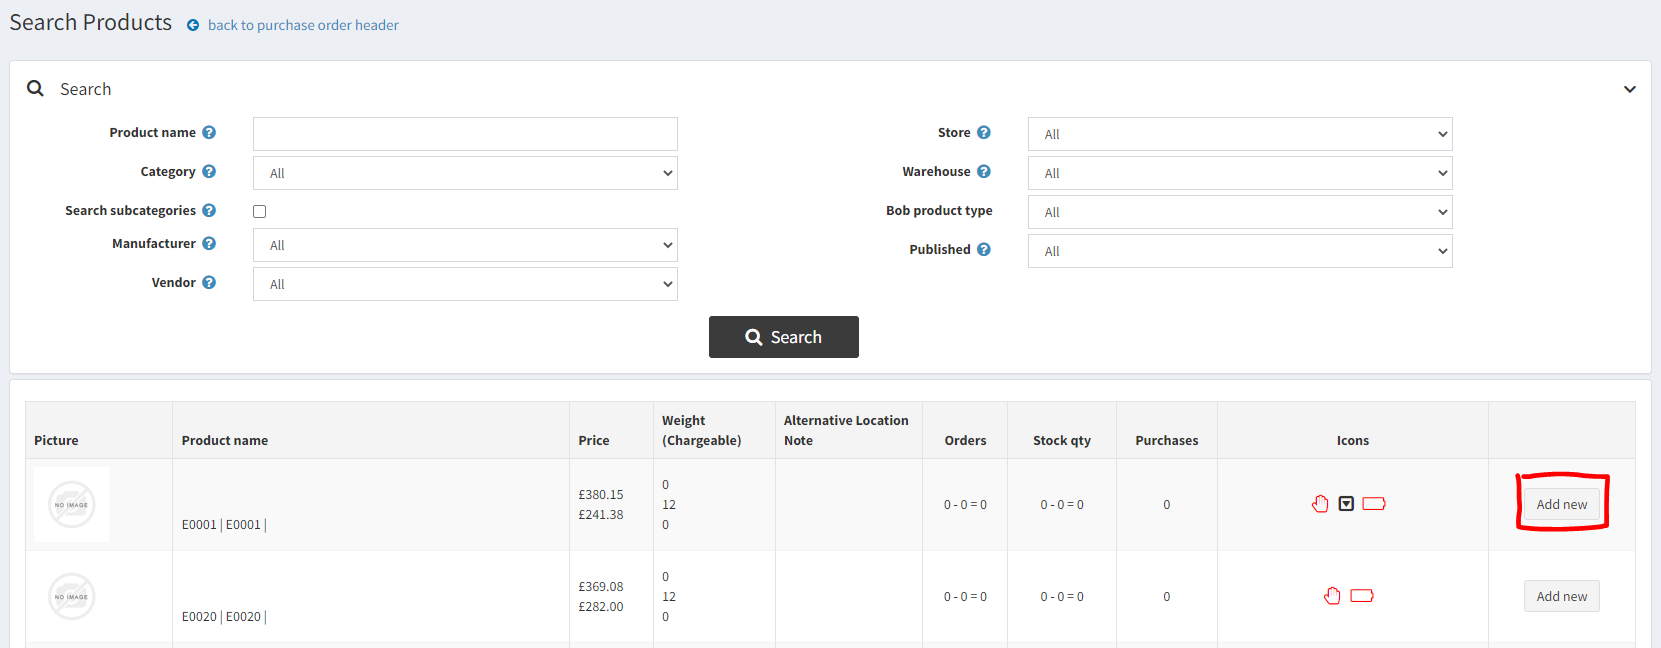
When selecting “Add New” an option box will appear.
- Back to Purchase Order Header – Re-displays the previous Purchase Order Maintenance screen.
- Go to Purchase Order Line Maintenance – Display the Purchase Order Detail Maintenance screen for the Product added.
- Continue – Allows you to select another Product to add to the PO.

Editing the Purchase Order lines
When you are back on the Purchase Order Maintenance screen you can amend PO lines from the grid at the bottom by pressing the “Edit” button against the rows added.

After pressing “Edit” against the Purchase Order detail line, it will display the Purchase Order Detail Maintenance screen.
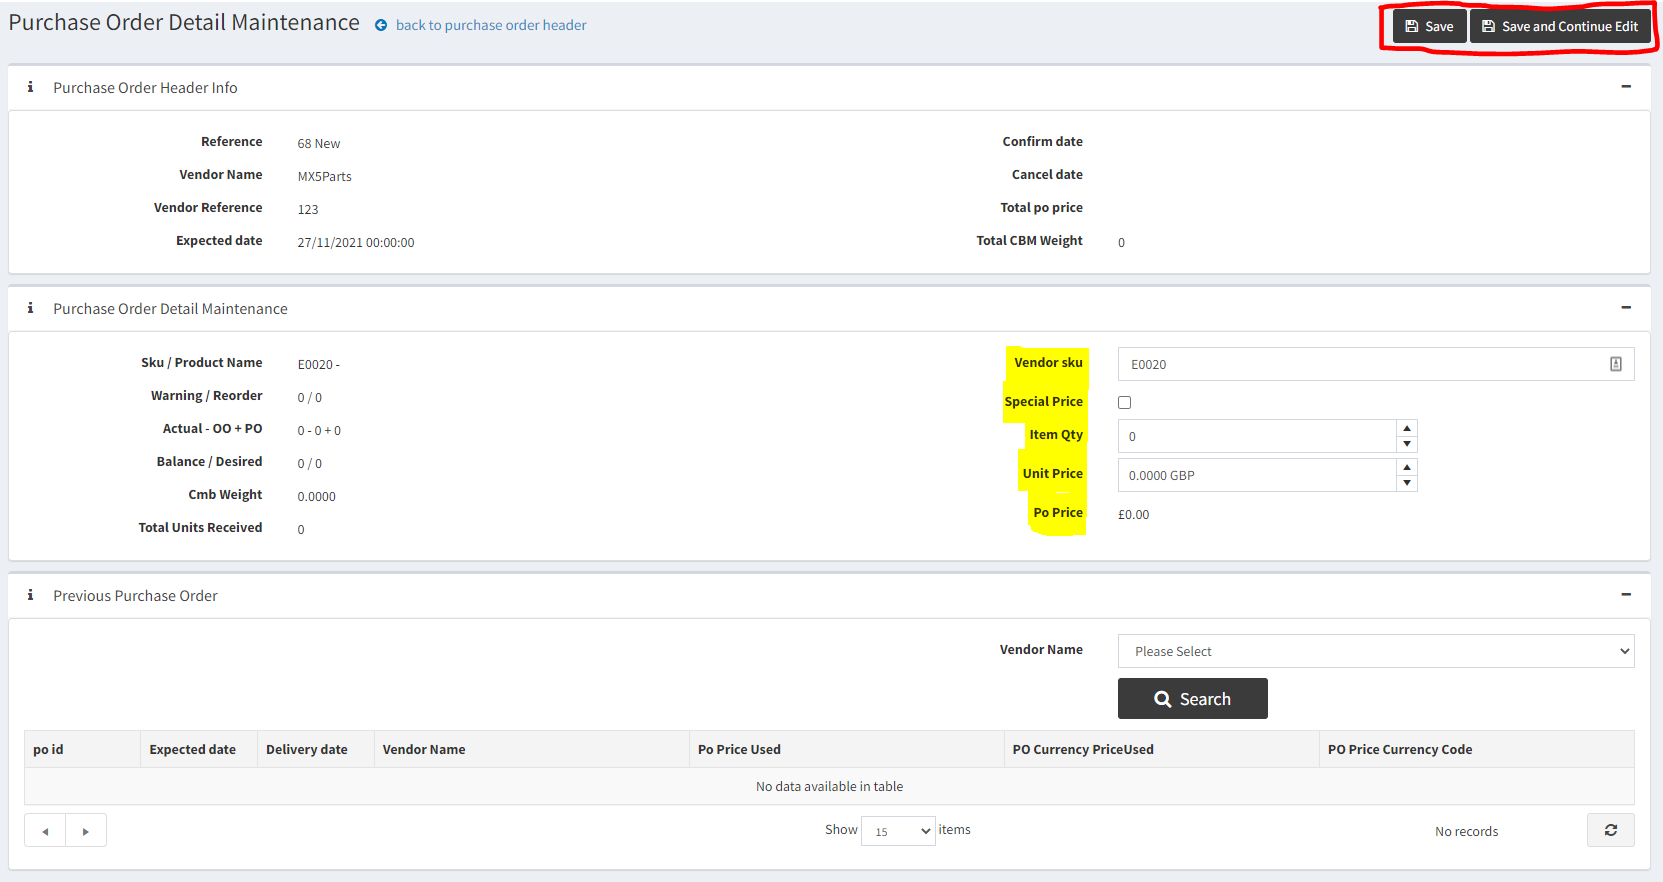
Ensure the following items are defined on this screen…
- VendorSKU, Special Price, ItemQty (how many your are purchasing), Unit Price (Price to be paid per unit)
Press Save or Save and Continue Edit and then return to the Purchase Order Line Maintenance screen.
Confirming the Purchase Order
Back on the Purchase Order Maintenance screen, when you are happy with the PO. Press the “Confirmation” button.
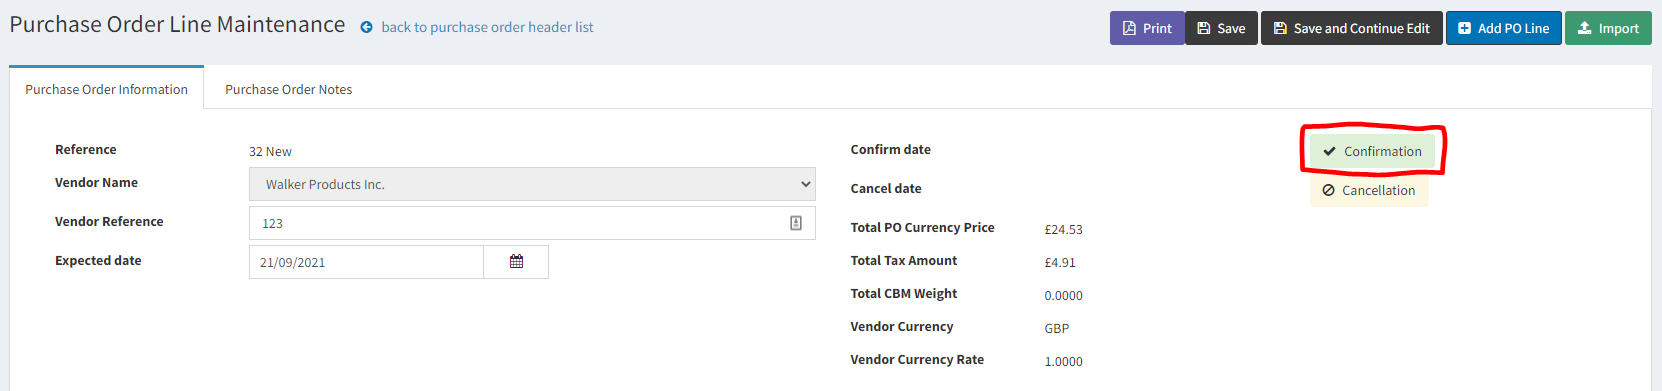
When Confirmed…
- Changes the confirmed date of the PO
- Extra buttons will be displayed in the top-right corner. Such as “Build GRN”.
Build Goods Receipt Note
Press “Build GRN” to display the GRN Maintenance screen and follow the tutorial below…
NOTE: If this is the first time your receiving the product then remember to MARK THE PRODUCT AS NEW and set the Start Date correctly for the Product . This helps with the full stock list & reordering